When asked why he preferred shooting with all-natural lighting, Stanley Kubrick simply replied, “Because that’s the way we see things.”

It’s a trend that’s growing in filmmaking. The excellent “Dallas Buyers Club,” for instance, used only all-natural lighting during filming. This sounds like it might make things difficult, but it actually came with its own benefits. Director Jean-Marc Vallee stated that the actors didn’t have to worry about hitting their marks to keep within lighting zones, so it offered a lot more creative freedom for the cast. The sheer heat of artificial lighting rigs was also not missed!
Whether you’re shooting with natural light simply because you’re on a budget or for stylistic reasons, we’ve got some tried and tested tricks on how to get the best out of it.
When Shooting Indoors:
1. If the room has windows, it’s generally a bad idea to shoot towards them. This will lead to overexposure and a nasty, bleached-out effect to the background (as well as anything in front of the windows being underexposed). Rather than wrestle between the two extremes, place place the camera adjacent to the window — to get more of a sidelight. This provides natural lighting from the window and avoids blow-out. This is extra important when interviewing for documentaries!
2. Load up on gel sheets. Specifically, ND gel. When applied to windows, it really cuts down on the amount of daylight and makes exposure a lot easier to manage (more on how ND filtering works here).
3. Aside from lighting itself, the most important thing in any cinematographer’s lighting kit are reflectors. We cannot understate this: they’re definitely vital outdoors, and even more so when shooting inside using only natural light. It’s by far the easiest way to manipulate and maximize whatever lighting you do have to get rid of problematic shadows. Note: You may find it difficult to get a proper return if you are reflecting indirect light.
4. Shake it up. You can’t always manipulate the light exactly to your liking, so manipulate the subject instead. Extreme planning before a natural light shoot is important so as to not waste time on the day, but be mindful that it’s sometimes best to scrap what you had on paper if it’s not looking right in the camera. Reposition everything if you must, and be mindful of those shadows as you go.
5. Scrims are your best friend. Scrims will not change the quality of light from hard to soft, but it will knock down the intensity by diffusing light. Diffusion may be your best friend.
When Shooting Outside:
6. Take advantage of blue hour and golden hour. Blue hour refers to the sliver of time after the sun disappears over the horizon but the sky is still lit, while golden hour is well known to filmmakers as the hour leading up to sunset (or an hour after sunrise). Blue hour is really handy for when you want to illustrate that it’s nighttime but don’t have any way of lighting a scene during actual darkness, and golden hour simply makes everything look gorgeous. There’s even a website that helps you plan for it in advance. That all said…
7. It’s not all about the golden hour. Keeping track of the sun is a very important factor in outdoor filmmaking, but you’ll also need to be conscious of what might get in between you and the sun at any moment — i.e.: clouds. While there’s not much you can do about the weather, you can note down any trees or buildings that might cast shadows at any given time (ideally when you do your first location scout).
8. Make sure everyone on the crew is prepared ahead of time. As with shooting indoors, you don’t want to be spending any more time than necessary setting up a shot or running through lines with the actors, especially when the sun is rapidly heading towards the horizon.
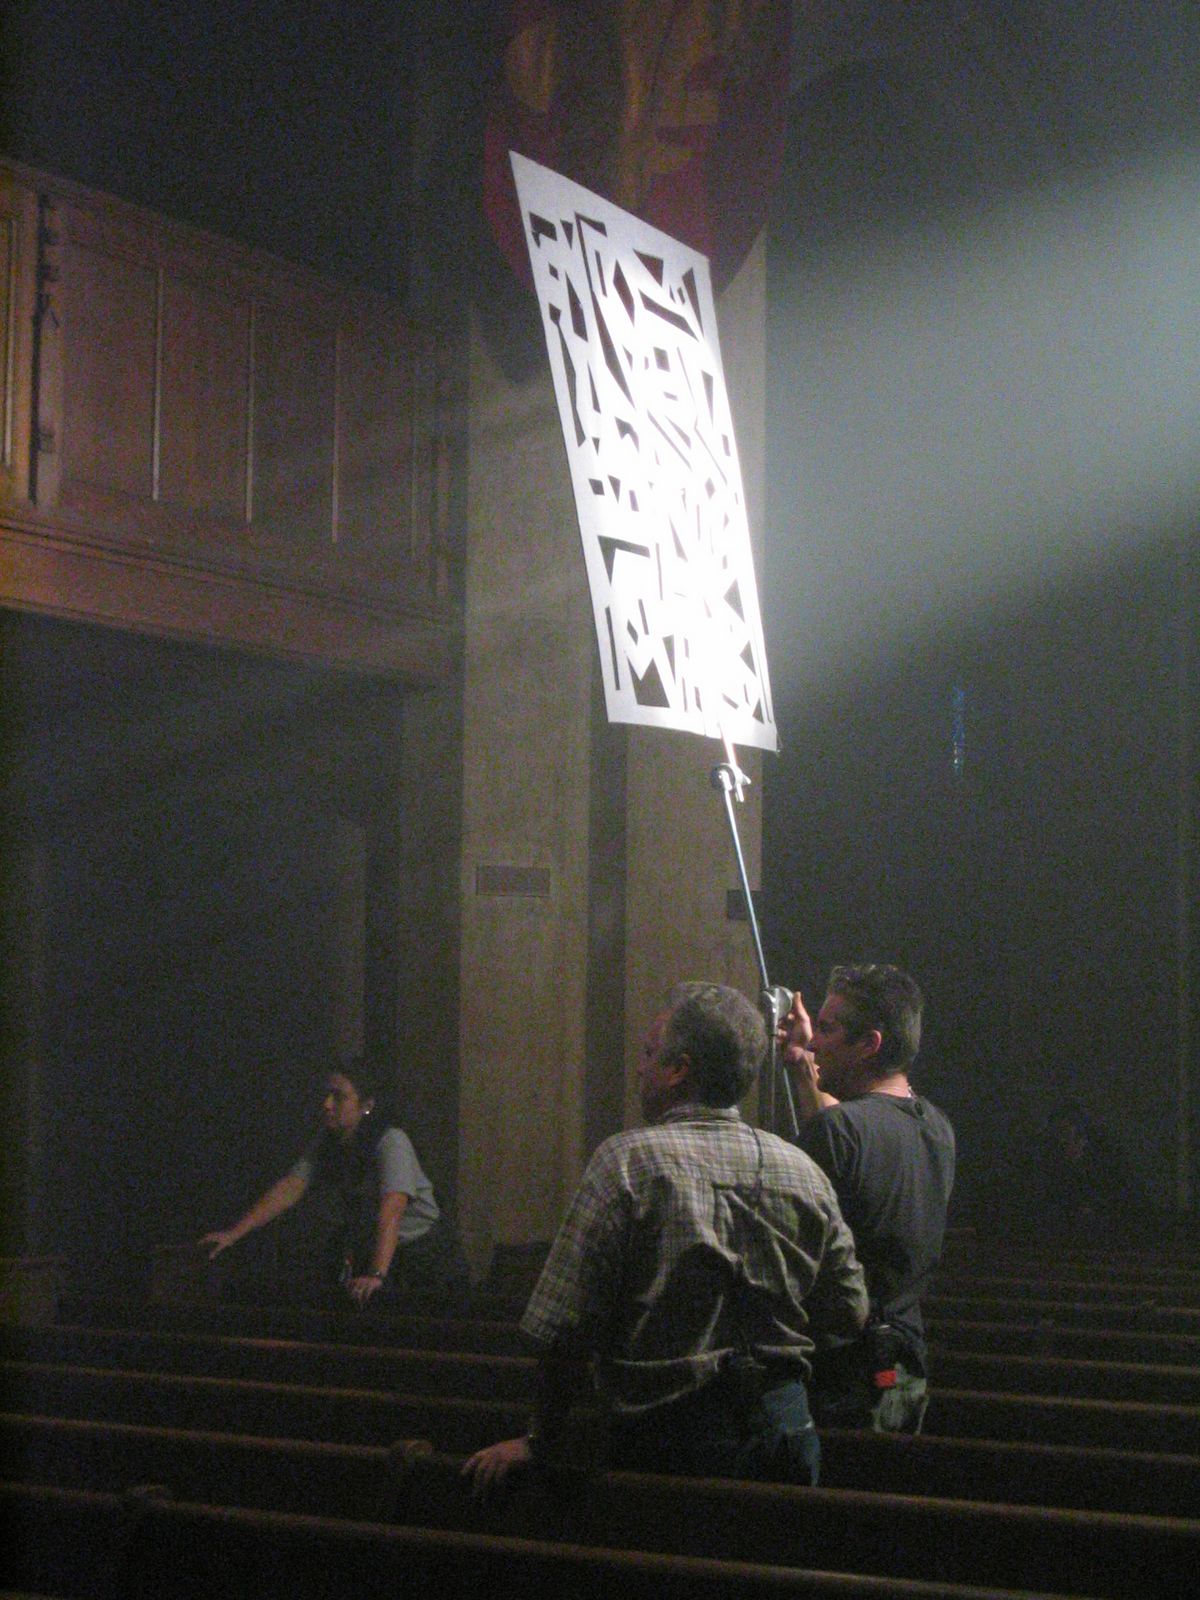
9. Make use of flags. Just as reflectors give you better control of how much light is going where, you’ll often find yourself in a situation where you’ve got too much light (particularly during summer day shoots). Flags — or cutters — are sections of thick black cloth stretched around a metal frame that allow you to block out sections of light and add some dramatic contrasting to the shot.
10. Pay attention to color and emotion. Getting the optimal amount of light is one thing, but getting the right “flavor” is another altogether. Be sure to check out our guide to color design, since a clinically perfect shot without any emotion whatsoever isn’t very compelling.
So there we have it: Hollywood-style cinematography without a Hollywood budget.
Our immersive 1-year, non-degree cinematography program offers students the opportunity to learn the fundamentals of cinematography through composition, exposure, and lighting. Learn more about the program on our 1-Year Program page.
 <
<