Have you ever seen a photograph of smoke, perfectly lit up on a black or white background? How do photographers capture the essence of smoke so flawlessly? Luckily, this technique is not as hard to duplicate as you may imagine. Below we offer some tips and advice on how to photograph smoke.
Equipment Needed
- A DSLR camera
- A tripod
- A black cloth
- A reflector
- Incense sticks and a match or lighter
- A lamp
- An external flash with a radio trigger or extendable cord
Setting Up
- Hang the black cloth from a large, blank wall. Try to make sure the cloth hangs as flat against the wall as possible.
- Place the incense in an incense burner on a table in front of the black cloth (approximately one foot in front of it). Don’t light it just yet.
- Position the lamp so that the light is pointed directly at the tip of the incense. As you’ll see later, the light from the lamp will not affect the final photograph.
- Position your external flash opposite the lamp so that it is also pointed directly at the tip of the incense stick. Adjust the power of the external flash to 1/16 to start out with. Make sure the flash is not pointed at the background. If you’re using a radio trigger, make sure your flash is synced with your camera. If you’re using an extendable cord, make sure one end is attached to your camera.
- Place the reflector (if you don’t have a reflector, you can also use a large sheet of white cardboard) directly opposite the flash, so that the light from the flash reflects off of the cardboard.
- Look around the room and make sure that all fans are off, windows are closed and there is no draft. Excessive airflow will disturb the smoke.
- Turn off any extra lights and close your blinds.
Camera Settings
As always, you’ll want to shoot in RAW format so that you have an easier time post-processing the images. If you don’t plan on editing the images in post, feel free to shoot in JPEG. RAW will make it much easier to tweak exposure and white balance, although it does take up more memory.
Your aperture should be set around f/8 to ensure that all your smoke remains in focus.
Your shutter speed should be set to the sync speed of your flash – typically, this is around 1/200 or 1/250.
Your ISO should be set to 100, ensuring that you have the least amount of noise in your final image. The higher the ISO, the more visible noise.
Your white balance doesn’t matter if you’re shooting in RAW format, but for all intents and purposes you can keep it on auto. If you’d like a warmer image, set your white balance to “shade”. If you’d like a cooler image, set your white balance to “tungsten”.
In order to focus the image, set your camera up on the tripod, turn on the lamp, and focus on the tip of the incense stick. Since the smoke will be coming from this point, this will ensure that your photograph will be in focus. Once you have done this, make sure your focus ring is switched to manual, and then tilt your camera slightly up and to the left, where the incense smoke will be rising. You want to make sure that you cannot see the stick of incense anywhere within the frame.
Taking the Image

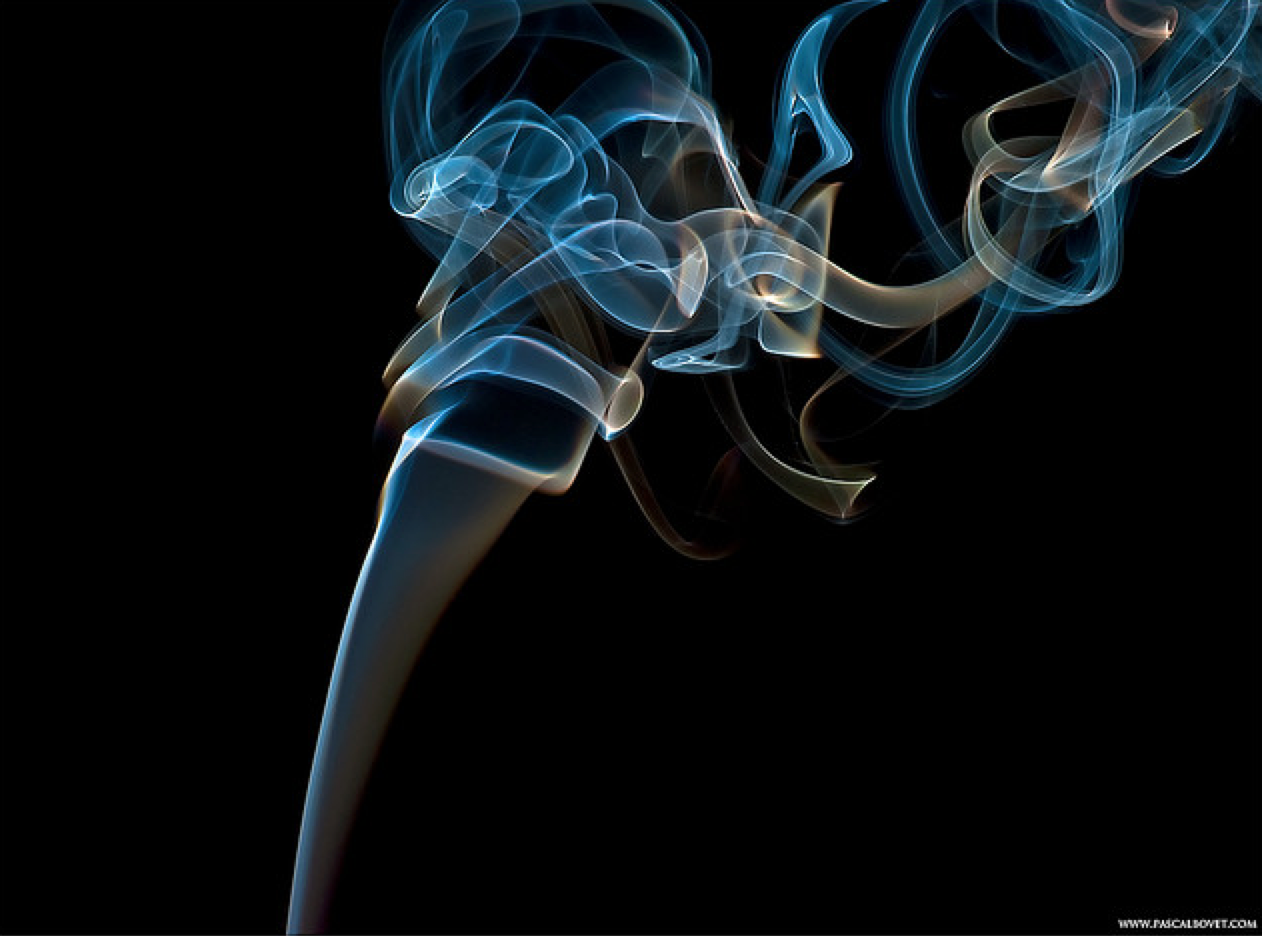
Light the incense. To do so, use a match or lighter to light the end of the incense stick until it burns red and catches fire. Lightly blow out the flame, and you should notice smoke begin to rise and a nice scent waft throughout the room.
Make sure your camera is in the correct position and set your exposure to the settings listed above. Take a look through your viewfinder and make sure that you can see the smoke throughout the frame.
Start photographing! Your flash should sync with your shutter, and the light from the lamp shouldn’t affect your image. Take a couple of test shots, and adjust your flash intensity accordingly. You can lightly blow the smoke, or even add another incense stick to create more intricate smoke designs. Since the shape and direction of the smoke is constantly changing, feel free to take as many photographs as you see fit. You never know what you’ll capture!
Post-Processing
Here’s where the fun really starts. Open up your image in a post-processing program such as Adobe Photoshop, and tweak your contrast, levels, and curves until all of your highlights and shadows are where you like them.
Is there any smoke in your image that you don’t like? This is an easy fix! Simply create a duplicate layer, select the paintbrush tool, and set the foreground color to black. Using a soft brush will create the best results. Now you can paint over the parts of the smoke that you don’t like.
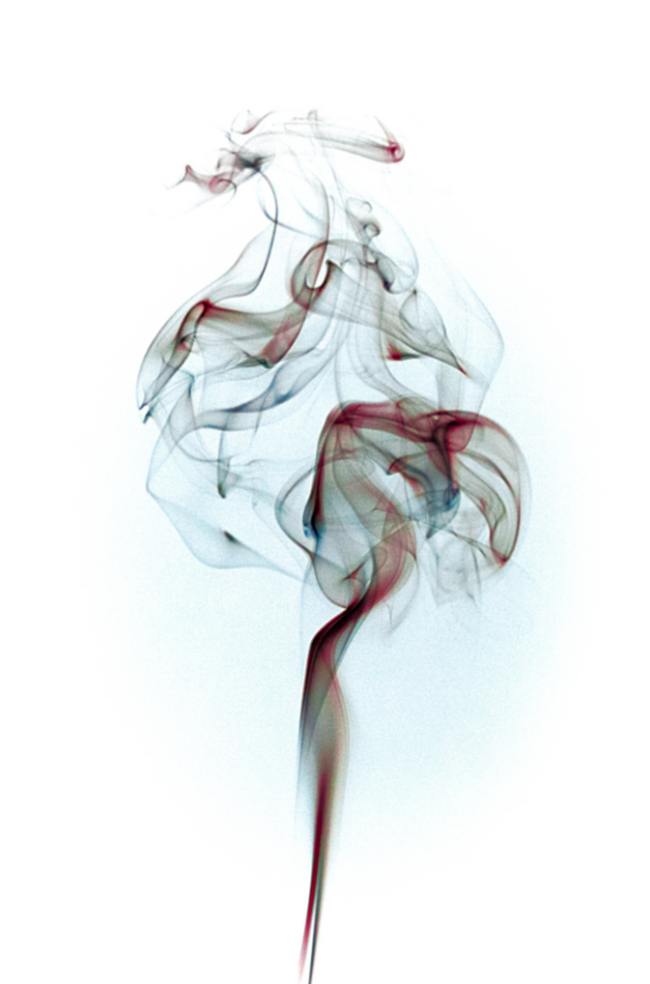
What about smoke on a white background? This is also an easy task to accomplish. All you need to do is inverse the image. You can do this by going to Image > Adjustments > Inverse. This will inverse all of the colors of the image, leaving you with a pure white background. If the background seems a little muddy, tweak the levels / curves again.
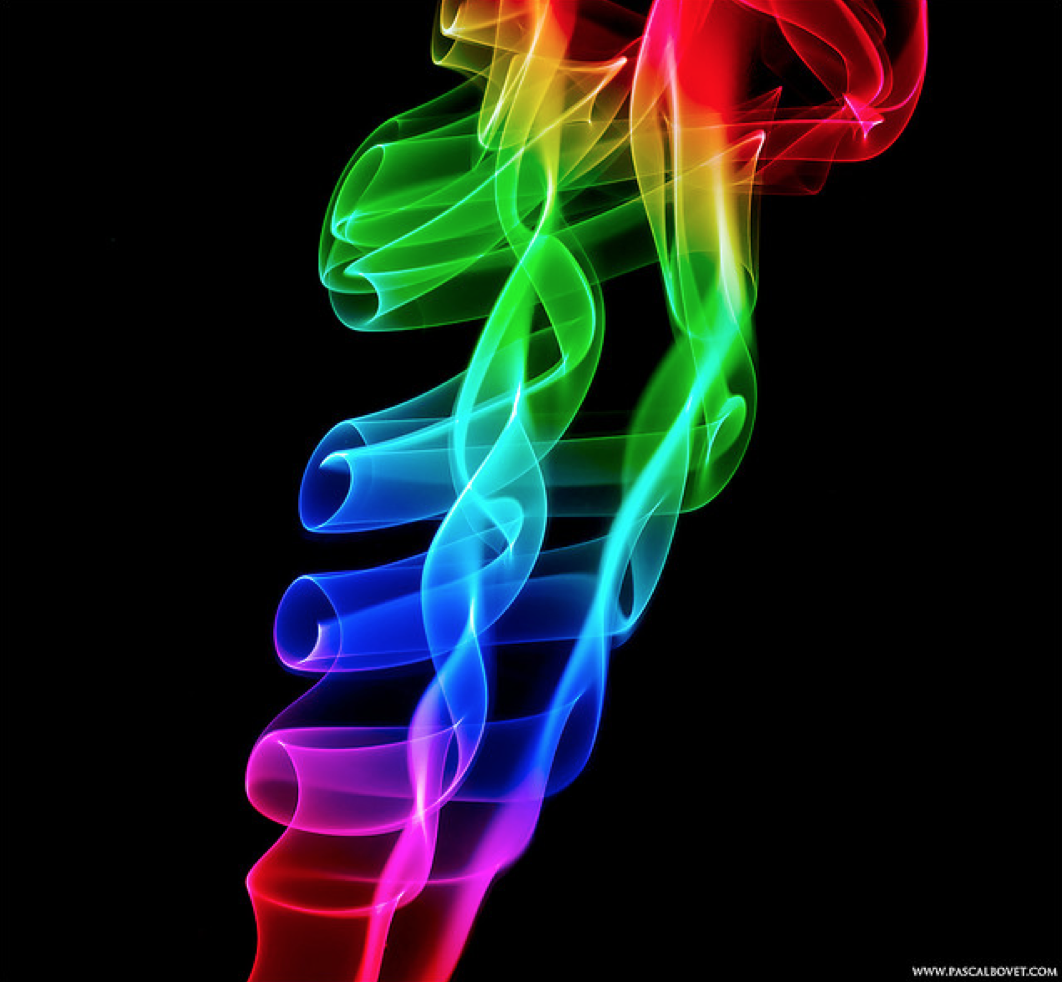
If you’re interested in colored smoke, create a new layer. Click on the gradient tool, and then create your own gradient with the colors you desire. You can then fill the layer with that gradient, and then set the layer mode to ‘multiply’. This should allow the gradient to come through only where the smoke is. You can further adjust the colors of the smoke by clicking on the gradient layer and tweaking the hue / saturation.
Getting Creative
When playing with smoke, the possibilities are endless! You are limited only by your own imagination, so play around with different colors, layers and even other subjects within the image! If you get tired of playing around with incense, colored smoke bombs are a cheap and fun way to add more smoke and color to your images. Keep shooting!
If you’d like to learn more about photographing smoke and other great photography techniques, enroll in a New York Film Academy photography workshop today!
