
Although bubbles may not be the most desirable subjects in the world (who wants to photograph a bubble, when there are vast landscapes and interesting humans to capture?), you can create some stunningly beautiful images with some homemade bubbles and a bit of imagination.
I’m sure images are coming to mind of using one of those cheap, 50c bubble wands to blow bubbles and rushing to press the shutter before they pop. While homemade bubbles can be tricky to photograph, they luckily last longer than those that you may be more familiar with. Once you make your own – with the perfect density and color – you’ll be able to not only take photographs of bubbles, but take photographs of scenes within bubbles.
Creating the bubble mixture
Why do you need to create your own anyway, when bubbles are so inexpensive and widespread? The cheap bubbles that children often use to play with aren’t dense enough to photograph easily, let alone capture a scene within. By creating your own mixture, you’ll realize that your homemade bubbles have a longer lifespan and seem to be more “durable” than your average bubble. There’s a lot more to bubbles than you thought!
Photographer Tom Falconer likes to make his own mixture before photographing bubbles, which you can make by combining the following:
1 oz Classic Dawn dishwashing liquid (don’t get the ‘ultra’ kind)
8 oz water
1 tbsp glycerine (which is used to thicken the walls of the bubble)
This mixture works especially well if you let it sit for at least 24 hours before using it!
Camera / exposure settings
It’s important to use a DSLR when photographing bubbles, since a small, point-and-shoot camera won’t allow you to create the perfect exposure or focus properly / fast enough to capture the shot. While yes, you can take photographs of bubbles with a point-and-shoot camera, if you really want to achieve great results you should use a DSLR. If you don’t own one, ask around at local camera shops to see if they rent some out!
If you can get your hands on one, use a macro lens or a good zoom lens. This will allow you to get close enough to the bubble to have it fill the frame, without getting so close that you’ll pop or disrupt it.
Your ISO should be set to 100 or 200 to reduce the amount of noise in the final image. This is especially true if you’re photographing on a dark background, as you don’t want viewers to be distracted from the beauty of the bubble by a noisy background.
Your aperture should initially be set around f/5.6 or f/8 to ensure that everything is in focus, although you can play around with larger or smaller apertures depending on what else you want in your frame.
Your shutter speed needs to be fast enough to freeze any slight movement of the bubble. If you’re using a slower shutter speed – slower than 1/60 – any slight movement of the bubble will blur the entire image. For these purposes, you should try to use a shutter speed of 1/200 or faster.
Focusing on your bubble is one of the hardest parts. Most auto-focus systems do a fairly good job at focusing on them, as long as there is enough contrast or distance between the bubble and the background. Once you have focused on the bubble, make sure you set your focus ring to ‘manual’.
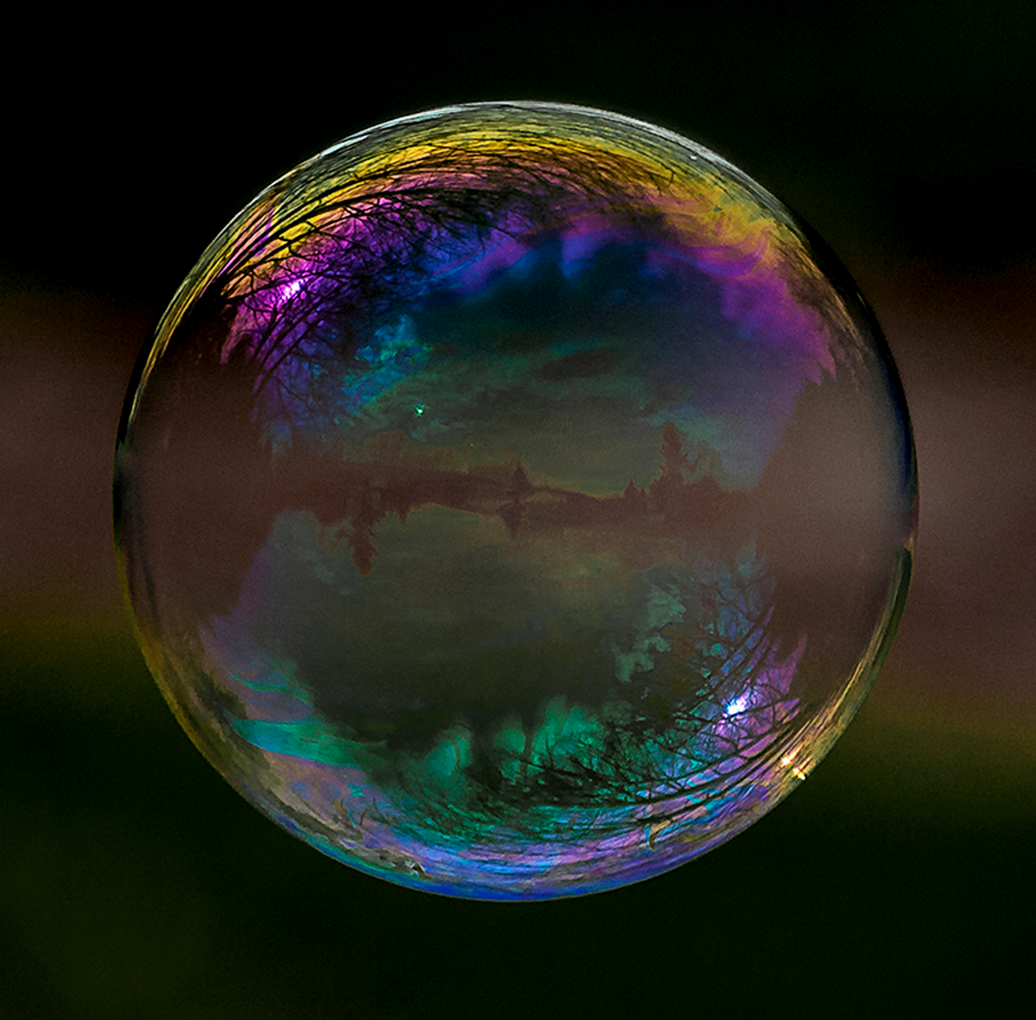
Proper lighting
The proper lighting is one of the most important aspects of creating your composition. Without adequate lighting, your bubble will look flat and uninteresting. By choosing a dark background, your bubble will stand out from the rest of the composition. And by choosing to shoot in shade rather than direct sunlight, the colors of your bubble will pop even more.
Time of day
The time of day (as well as weather, etc) you choose to shoot is almost as important as the lighting. You should choose to photograph your bubbles on a day where wind is at a minimum. If you shoot on a windy day (or even a day with a light breeze), the wind will continuously blow the bubble out of your composition. To reduce the amount of frustration, shoot on a calm day! The best time of day to photograph is early in the morning, right after sunrise. A cool (but not extremely dry) day is ideal.
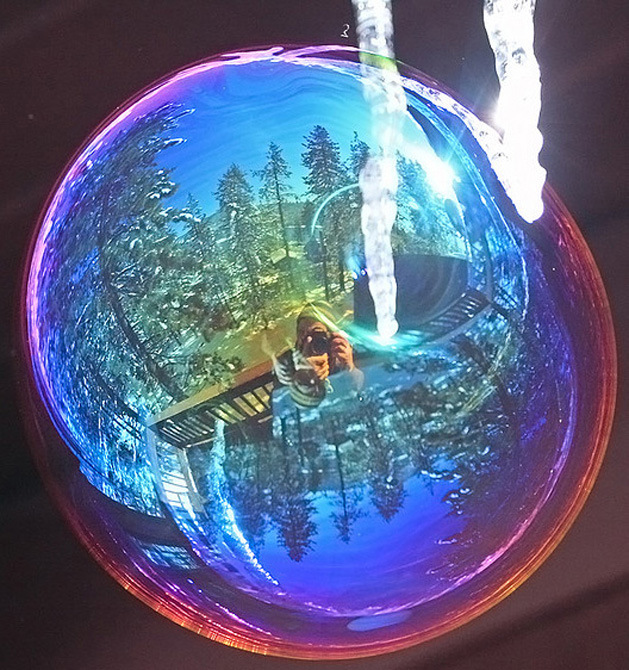
Capturing reflections
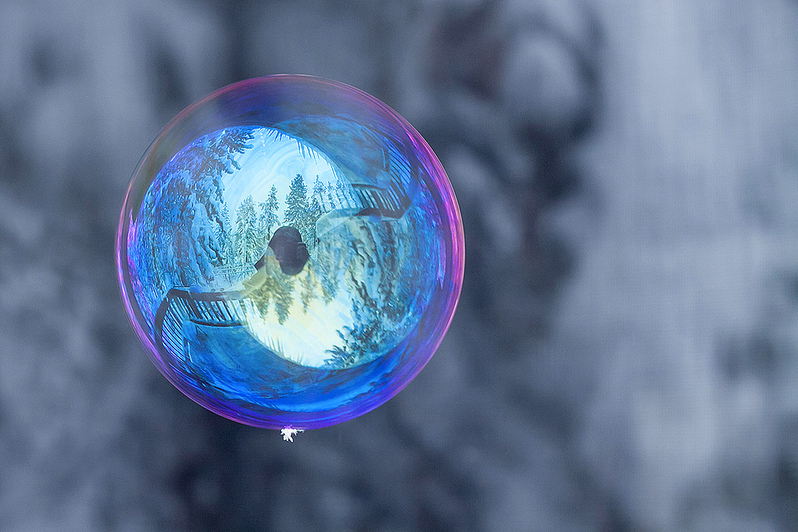
One of the best things about photographing bubbles is the reflection. You can capture entire landscapes within one small bubble! Once you have found a location in the shade with a darker background, you should blow one test bubble and look at it from all angles. Which angle shows the best reflection? Once you have figured this out, you can stand in that position, pop the bubble, and blow another one. Look for the same reflection, and click the shutter! You may need to take a test shot first and adjust your exposure as necessary.
Getting creative
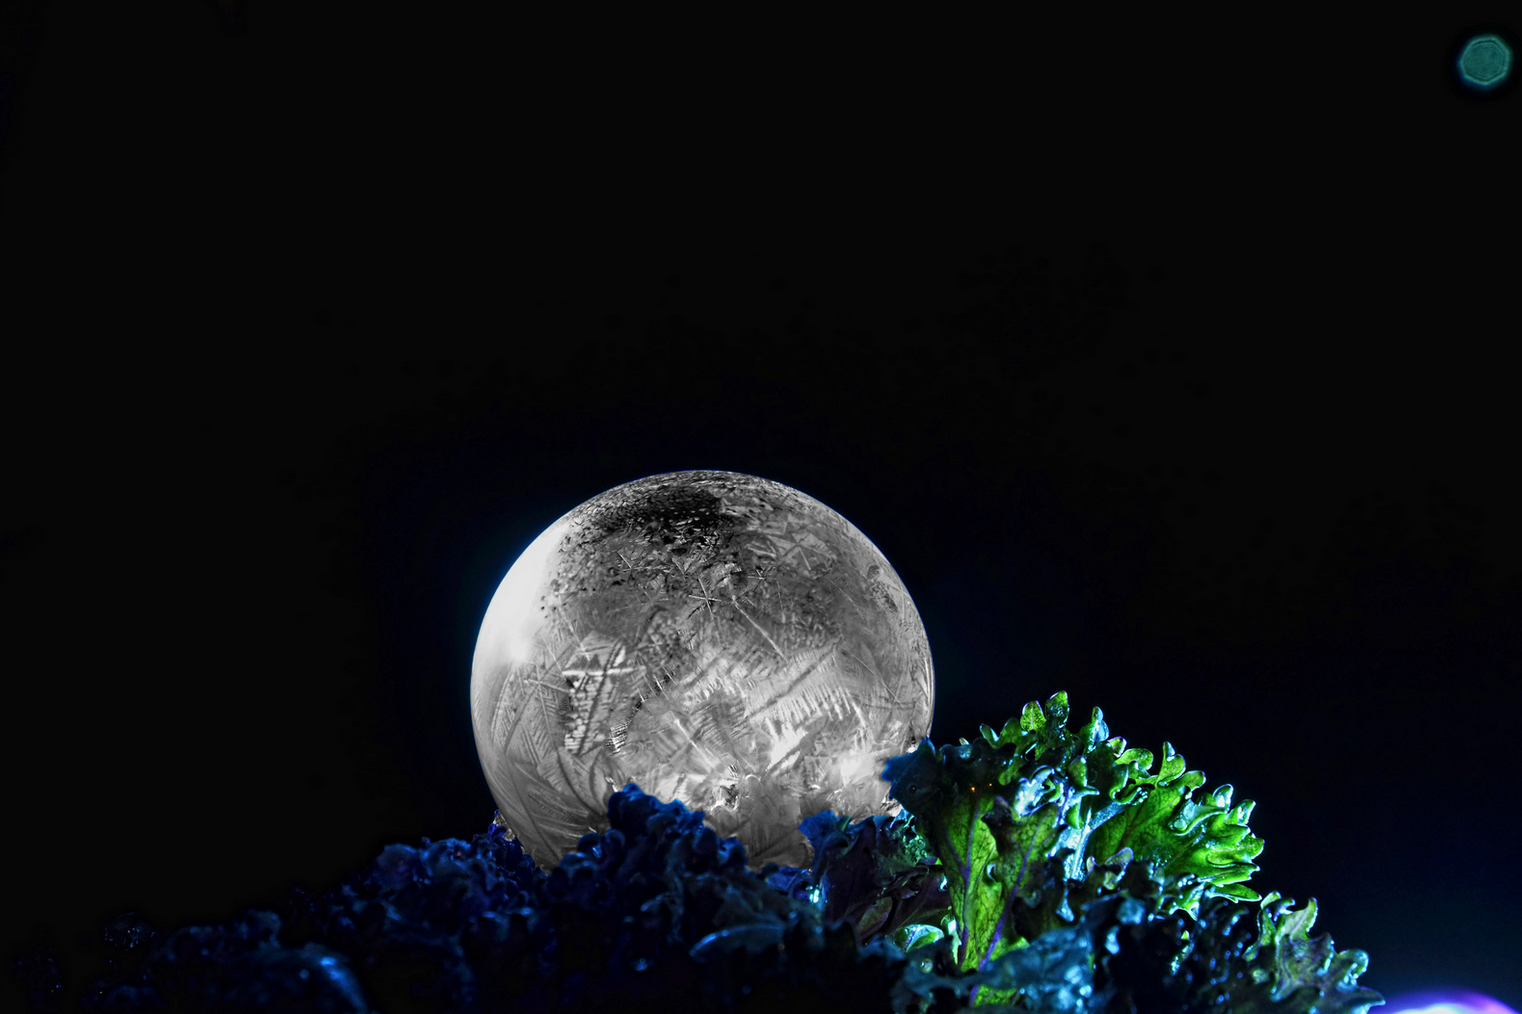
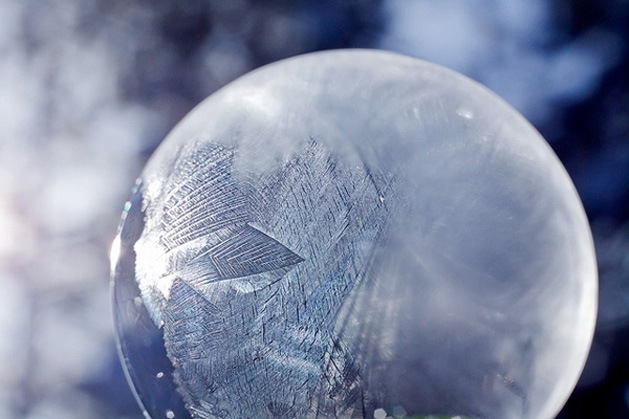
You don’t only need to photograph reflections within bubbles! You can freeze bubbles first and then photograph while “popping” them, you can photograph bubbles within bubbles, or you can add a bunch of these bubbles to a traditional landscape or portrait! The possibilities are endless.
